How to Setup Quicklist Card Scanning Software
Once you've signed up for Pro Seller by TCGplayer, you'll be able to access Quicklist — our card scanning software designed to make inventory updates a breeze.
Before we dive in, let's touch on requirements: Quicklist is PC exclusive software, so you'll need Windows 10 and a USB camera to get going. Make sure your camera has a resolution of at least 1600x1200 — or 2 megapixels. We often recommend this one.
Alright, now that system requirements are out of the way, follow the instructions below to get started or click on the specific section you need help with.
Customizing the Quicklist Interface
Setting up Your Scanning Station
Downloading Quicklist
To get started, just use the link in your Pro Seller by TCGplayer welcome email that looks like this:
Or follow the link under the "My Details" tab in your Seller Portal:

Authorizing Quicklist
1. Make sure you're logged into TCGplayer.com and your store's inventory is set to live.

2. Launch Quicklist.
Remember, the "My Details" tab of your Seller Portal will always have the latest version of Quicklist available to download when you need it.
3. Once Quicklist is open, you'll see a window titled "Confirm Your Quicklist Authorization Key." Select "Click here to get your code."

4.You'll be taken to your Seller Portal, where you'll see a button that says "Authorize." Click that button.

5.When you click that button, you'll see an authorization code generate for you. Copy the code.

6.Head back over to Quicklist and paste that code into the box and click "confirm."
And, boom, you're in.
Next, we'll get you set up.

Configuring Quicklist
1. If you just downloaded Quicklist, you can ignore this step.
If it's been a while since you downloaded Quicklist, go to the updates dropdown in the top left corner of the window, and select "Update Quicklist Software."
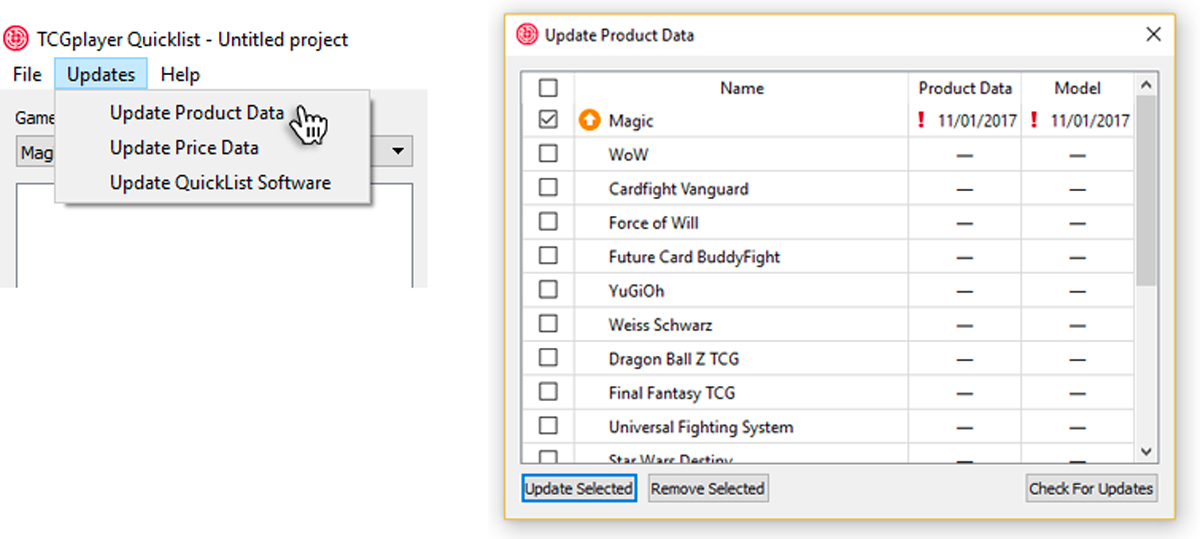
2. Before you're able to scan cards for a specific game, you'll need to download the products and prices for that game.
It's easy — just head back up to the updates dropdown in the top left corner of the window and click "Update Product Data."
Check the boxes next to the games you want to update, and click "Update Selected."
You can also click "Remove Selected" if you want to remove a game.
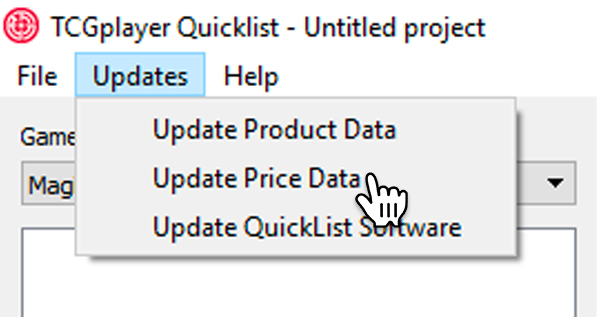
3. Use the Updates dropdown to select "Update Price Data." This will ensure all the Market, Buylist and Store prices are current.
Customizing the Quicklist Interface
It's easy to customize Quicklist to fit your store's specific needs and processes.
To customize your columns, open the Quicklist software and click on the column icon (to the right of the "Restore Defaults" button) in the navigation. A "Column Options" window will appear.

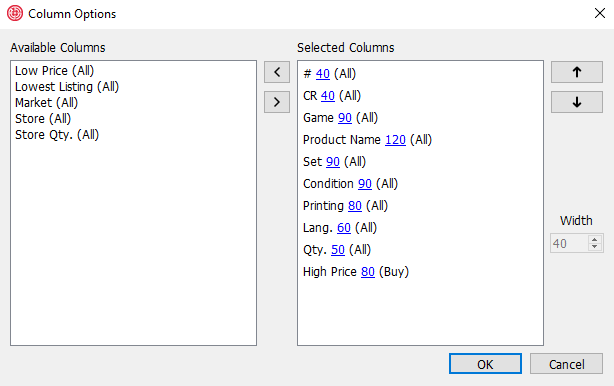
Columns you aren't using right now are visible on the left, under "Available Columns," while the ones you are using can be seen on the right, under "Selected Columns."
To change a column's visibility, highlight it and use the left and right arrows to move it from inactive (Available Columns), to active (Selected Columns), or vice versa.
To change the order that columns appear, select the column you want to move and click the up or down arrows. Columns closer to the top of the list come first.
Finally, you can set the default column width using the "width" selector on the right.
Showing your Selling or Buying Prices.
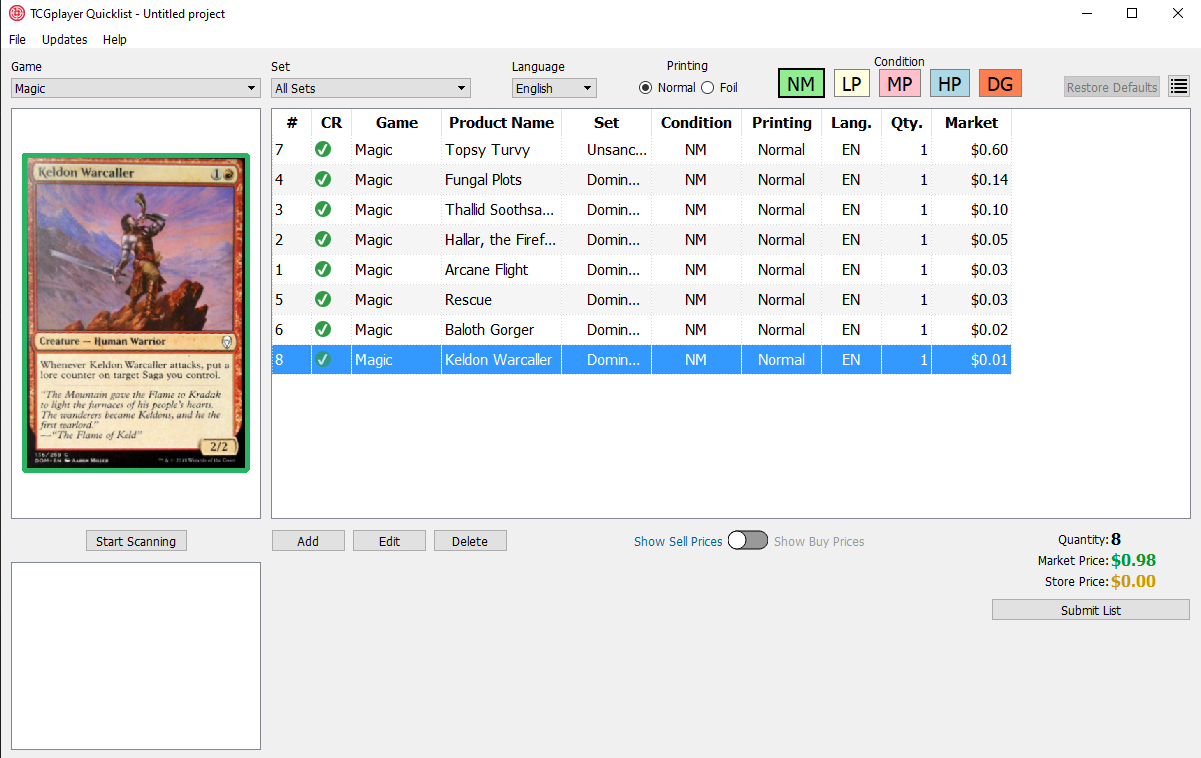
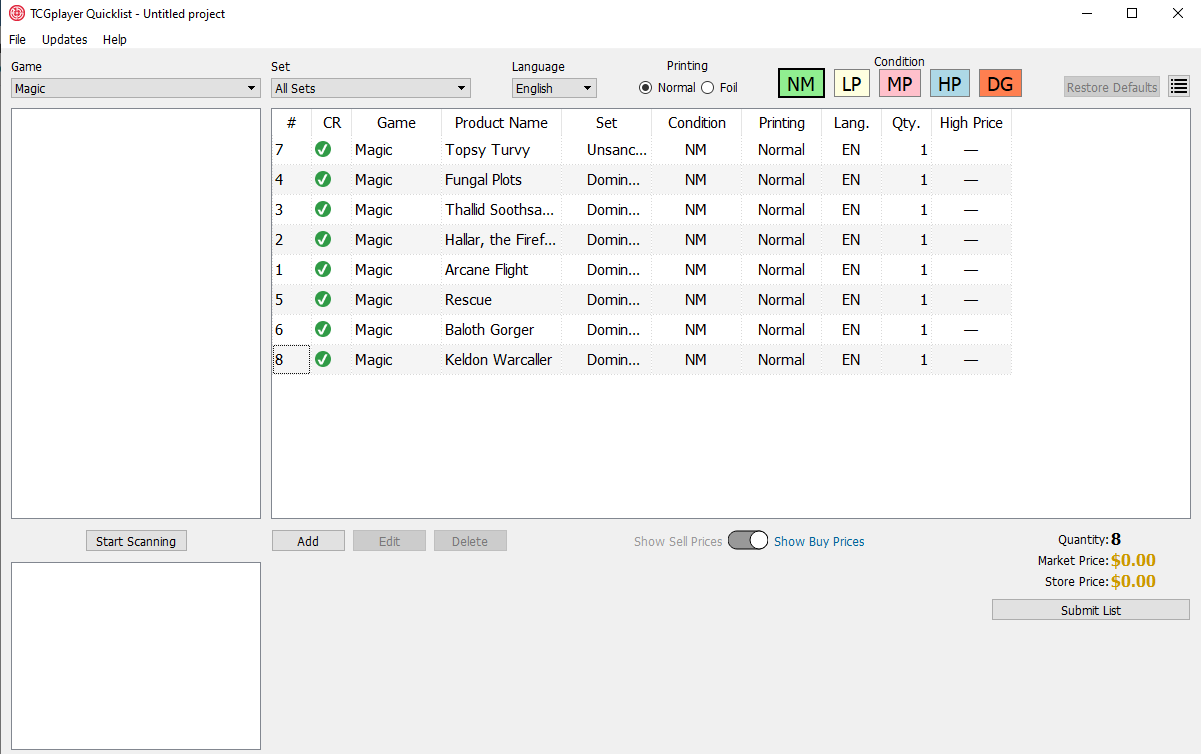
Toward the bottom of the interface, you'll see a toggle that says "Show Sell Prices" and "Show Buy Prices."
When you've got "Show Sell Prices" selected, your pricing column will show market prices. And when you've got "Show Buy Prices" selected, the pricing column will switch to show you the Buylist high.
Setting Up Your Camera
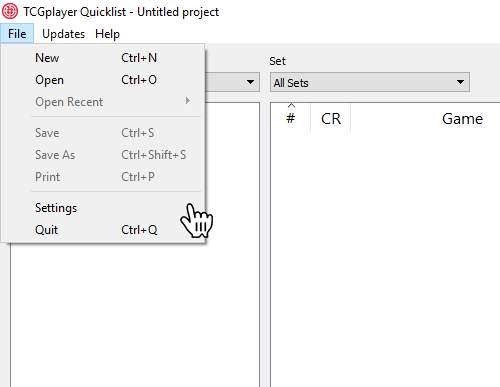
Click the "File" dropdown in the top left corner of the window, and select "settings." Then, select the "Input Source" tab.
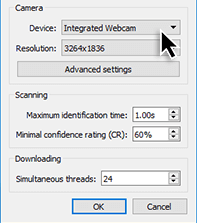
Under "Device," select your camera. Then, select its resolution.
Note: Though advanced settings aren't critical for getting started, they may help fine-tune your setup later. Circle back to them after you've got your scanning station all set up.
End note.
Click "Ok," then click the "Start Scanning" button just above the box in the bottom left corner of the screen.
Aaaand we have liftoff! Only one bit of setup left — you're doing great.
Setting up Your Scanning Station
Before you start scanning, you'll want to make sure your card scanning station is set up properly. There are two major factors that result in high-quality scans — first, the lighting, and second, the scanning surface.
Here are some tips for making your station awesome:
Make sure you've got sufficient light. A dedicated lamp for the station will go a long way! We recommend this one.
If you're having trouble with card-glare, try slightly tilting your light source. It also helps to have a large light source, if possible. The larger the light, the softer it'll be.
As for your scanning surface, the best thing you can do is use a plain white playmat. The color ensures that Quicklist is only picking up on details that help it identify the card you're scanning, and the cloth surface of the playmat doesn't reflect too much light. And, let's be honest, it makes it way easier to pick cards up after putting them on the table. Win, win, win.
---
Alright! You're all set up and ready to start scanning your inventory, buying cards, or making sales...quickly.
If you've got any questions, don't hesitate to reach out! We're here to help.
Note: Anonymous usage statistics improve Quicklist’s image recognition algorithm. You can enable and disable this feature within your Settings under “Privacy”.
