How to Begin Scanning Cards with Quicklist
Once you've enrolled in Pro Seller by TCGplayer, you'll be able to access Quicklist — our card scanning software designed to make inventory updates a breeze
Select your Condition, Printing and Language Settings
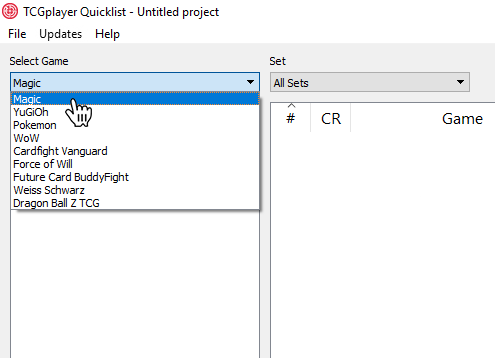
Select your Game
In order to start scanning, you'll need to tell Quicklist which game you'd like it to look for. There are two ways to do this. You can either use the dropdown menu in the upper left corner of the screen, or you can scan the back of a card and Quicklist will change the game for you.
If you've selected a game that has updates, Quicklist will automatically trigger a small update to make sure you're seeing the latest information.
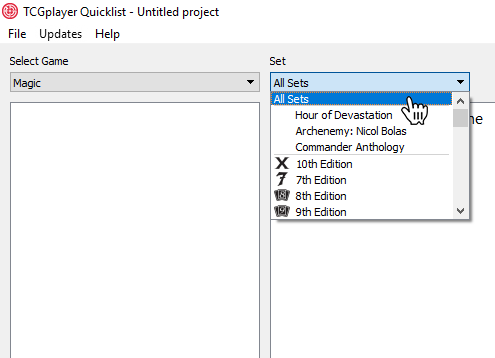
Once you've selected a game, you can choose from a list of available sets for that game using the dropdown labeled "Set."
If you scan a card that isn't in the set you chose, don't worry, Quicklist will check other sets to ensure it finds a match.


Select your Condition, Printing, and Language Settings

Quicklist helps you scan inventory fast by remembering the language, printing, and condition of the batch you’re scanning. Simply adjust the settings at the top of the screen according to what you’re working on.
- Using the radio buttons in the top-middle of the screen, select the printing option for the cards you are about to scan.
- To the right of the printing options, click on the box that corresponds with the condition of the cards you will be scanning (Note: it is often more efficient to sort your inventory by condition prior to scanning so you only have to select a condition a few times)
- Using the dropdown menu to the left of the printing options, select the language of the cards to be scanned.
- English = EN
- Chinese(Traditional) = CT
- Chinese(Simplified) = CS
- French = FR
- German = DE
- Italian = IT
- Japanese = JP
- Korean = KR
- Portuguese = PT
- Russian = RU
- Spanish = SP
Scanning Your Cards
Now that you have selected your game, printing, and condition, you can start scanning. Click the “Start Scanning” button above the square in the bottom left corner of the screen, and place a card underneath the scanner. Once Quicklist has scanned the card, you will see the image appear on the left-hand side of the screen, and its info on the right.
Note: Quicklist will not scan the same card twice in a row. If you have multiple copies of the card, you can adjust the quantity using hot-keys or the “Edit” button.
Quicklist Hotkeys
CTRL + N = New
CTRL + O = Open
CTRL + S = Save
CTRL + Shift + S = Save As
CTRL + P = Print
CTRL + Q = Quit
When row in list is selected:
C = Set condition
P = Set printing
L = Set language
Left and Right Arrow Keys = Change set
Space = Start/Stop Scanning
Numbers = Set quantity
These are a few hotkeys within Quicklist that provide fast access to frequently used functions
Image Recognition Tips:
- When detecting card images, make sure to have the entire card in the frame. If anything is near the edge of the detection area, then the software may not be able to detect the card. Under Settings > Advanced Settings, you can enable a darkened boundary that should be avoided when detecting cards.

- Make sure that there are no other objects in the image detection area.
- When scanning multiple cards, it's best not to stack them as you go. Once a card has been scanned, remove it and move onto the next one.
- When scanning foil cards, glare can be tricky to avoid. Sometimes, it's best ot angle your camera a little bit.
- For the best results, cards should be sleeve-less. Sleeves can cause glare and make it harder for Quicklist to recognize the card.
Once you've scanned the cards that belong in this list, it is time to upload them to your Seller Portal. Click the "Submit List" button in the lower right corner of the screen to send them off.
This will bring you to the Manage Lists tab in your Seller Portal, where you can use the list to edit your inventory. You can also save the list to be added later by using the Save feature in the File menu.
If you’ve got any questions about Quicklist, please reach out to our Customer Service team here.